Google Cloud Build で Firebase Hosting へデプロイ
前回の記事 React + Firebase Authentication で Firebase Authentication を利用した認証ページを簡単に作成しました。今後、このページを公開するのにデプロイ先を考えなければいけません。近場(?)に Firebase Hosting があるので今回はそれを利用しましょう!
ただし、デプロイするのに毎回コマンドを実行するのは煩わしいので自動化しちゃいましょう。
Cloud Build
Cloud Build では、すべての言語でソフトウェアを迅速にビルドでき、複数の環境(VM、サーバーレス、Kubernetes、Firebase など)での構築、テスト、デプロイ用にカスタム ワークフローの定義を完全に制御できます。
Cloud Build プロダクトページ
Google が提供しているビルドサービスです。各種コンテナを読み込んだりしてビルドを行い、最終的なコンテナを作成してくれます。
Firebase コンテナの準備
Cloud Build で firebase コマンドが必要になるのですが、このコマンドを実行できるコンテナを準備します。
手作業で作成する必要はなく、コミュニティチームがすでに作成していますので、それを活用します。
$ git clone https://github.com/GoogleCloudPlatform/cloud-builders-community.git
$ cd cloud-builders-community/firebase
$ gcloud builds submit --project <project name> --config cloudbuild.yaml .
事前に gcloud auth login で今回使うアカウントでログインをしておいてください。
Cloud Build でトリガーの設定
今回ソースリポジトリをGithubにしています。またmasterブランチがpushされたらビルドが走り、Firebase Hosting へデプロイされるようにしたいと思います。
Cloud Build に権限を追加
Cloud Build の Setting ページで「Cloud Functions」「Firebase」の Status を Enable に変更してください。Cloud Build を実行するサービスアカウントに「Cloud Functions」「Firebase」を操作する権限を付与します。
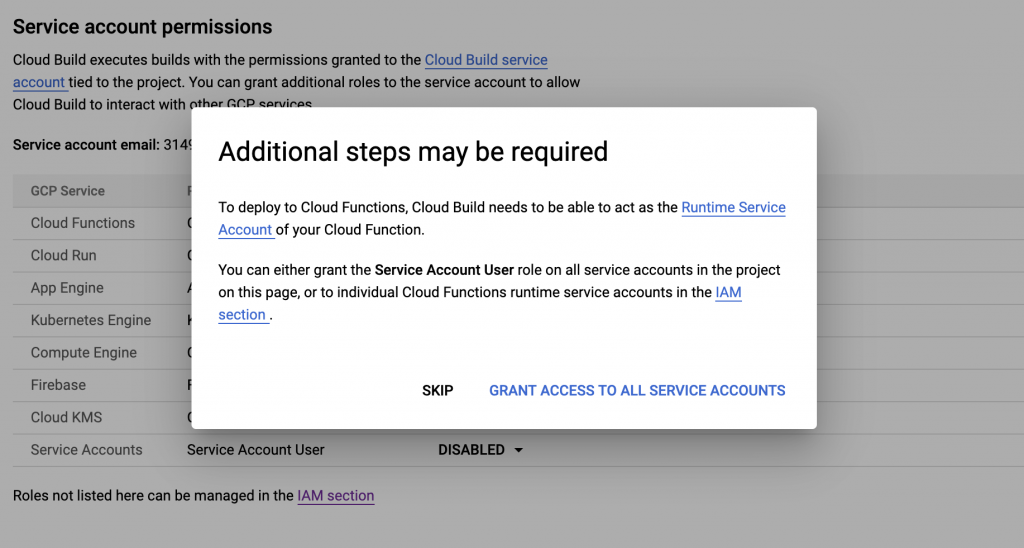
有効にする際に警告が表示されます。「Service Accounts にも付与するけどいい?」と聞かれるの付与してください。
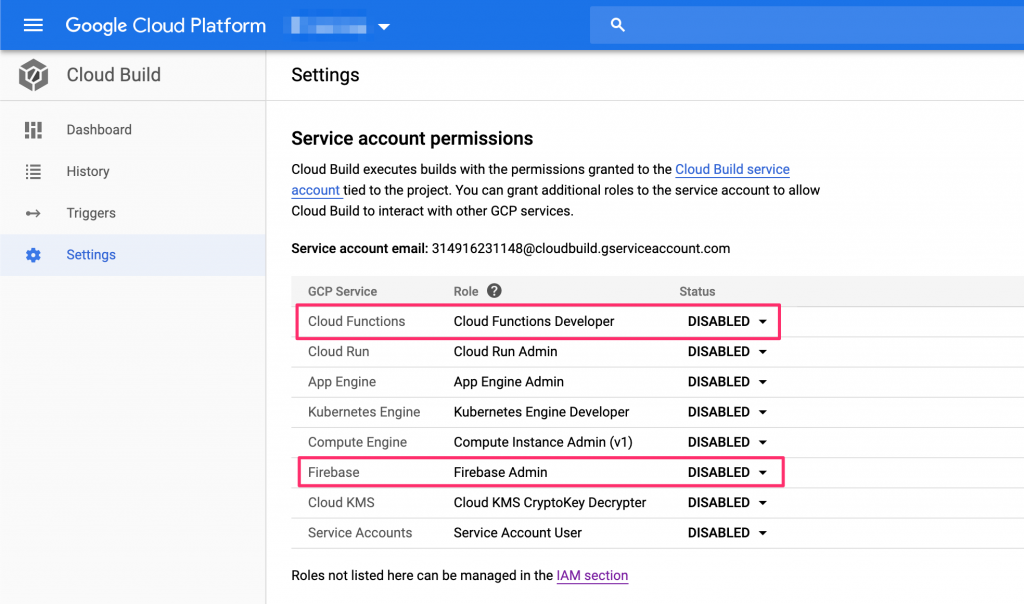
結果的に「Cloud Functions」「Firebase」「Service Accounts」の Status が Enable になります。
トリガーの作成
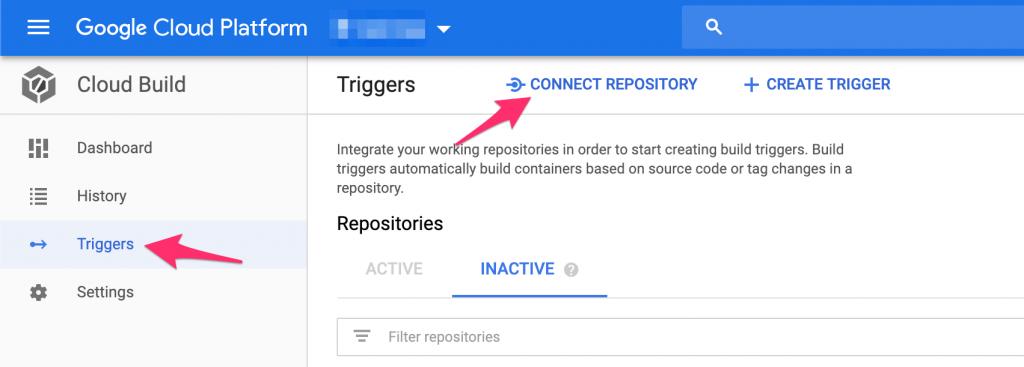
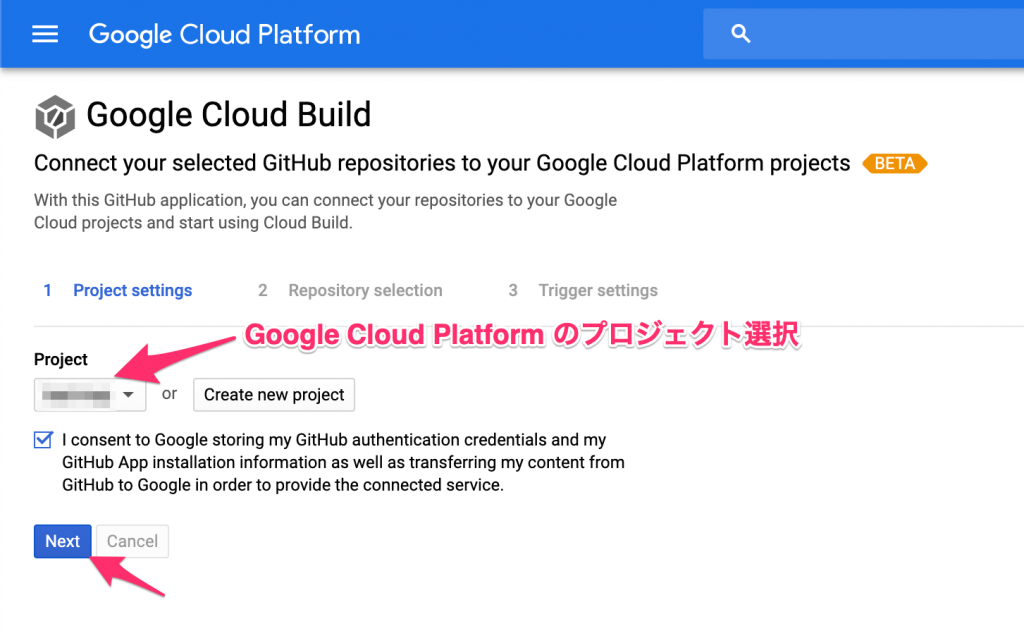
Cloud Build の Triggers ページで上部の CONNECT REPOSITORY を選択。今回は Github との連携を行います。
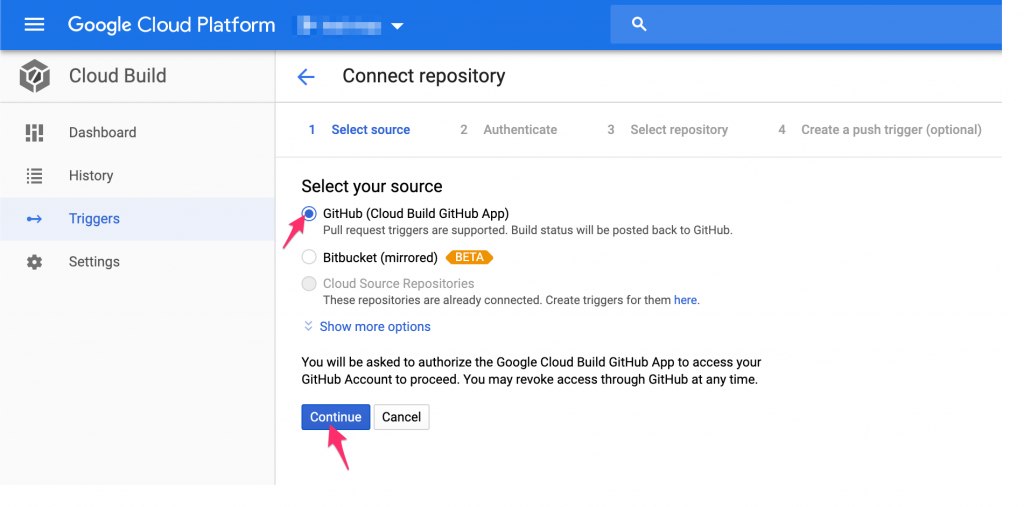
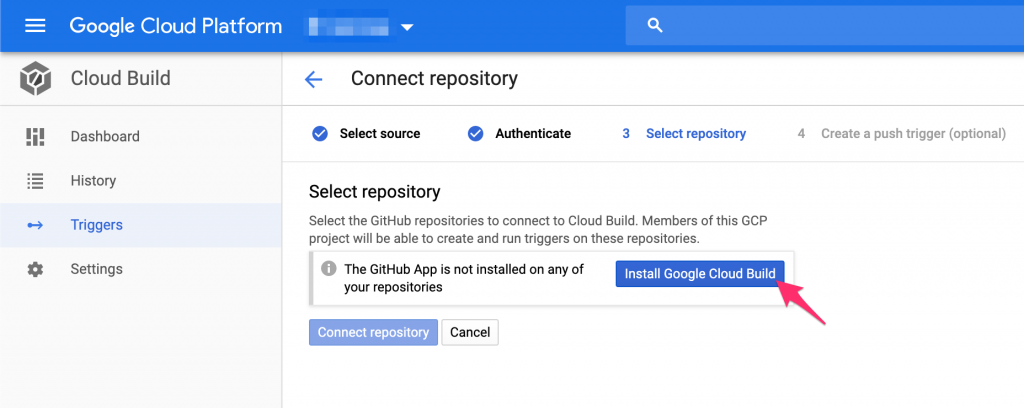
Github 側に Google Cloud Build のアプリケーションをインストールする必要があるので、これを行います。ここから別ウィンドウで行われます。
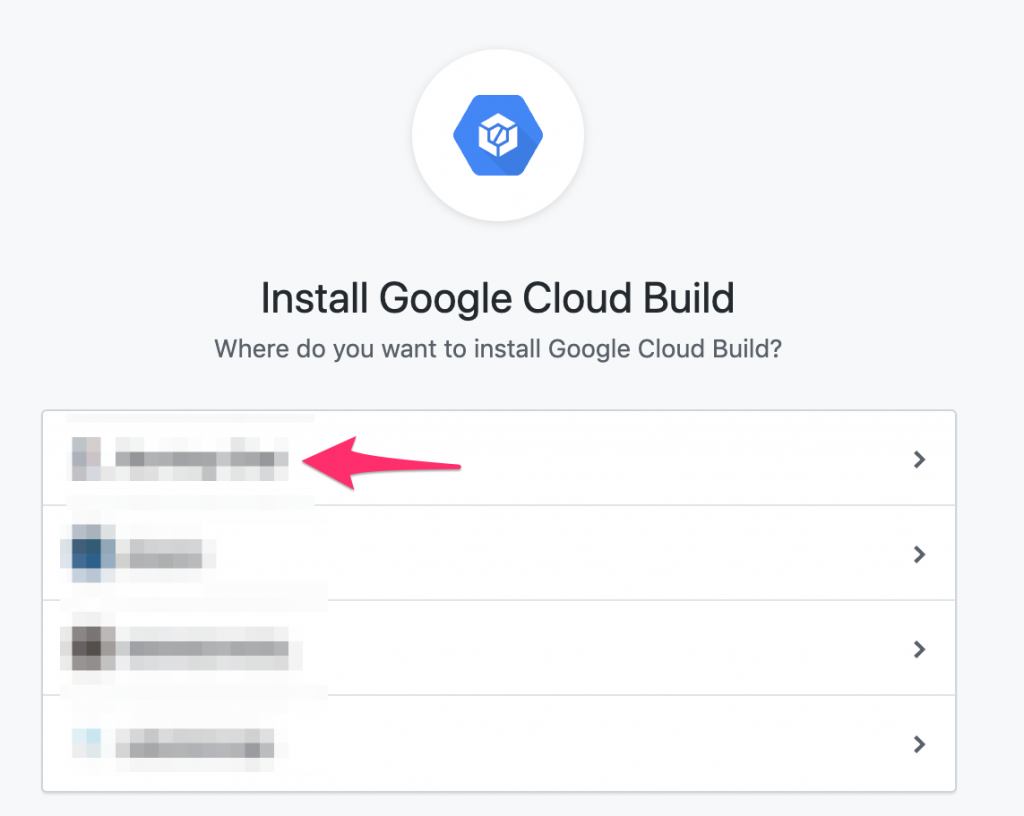
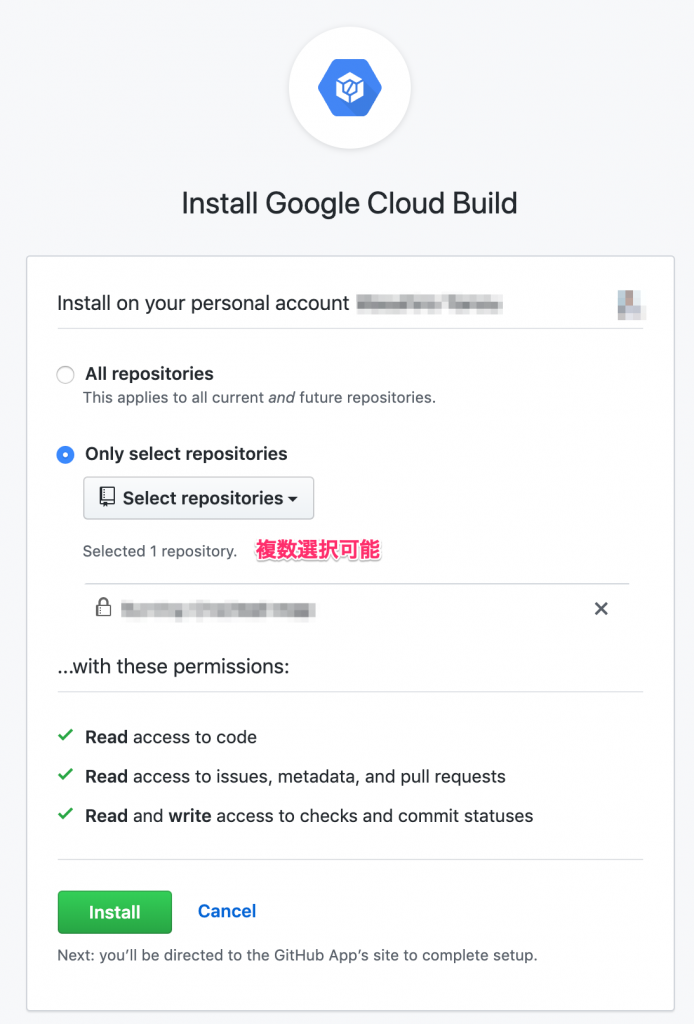
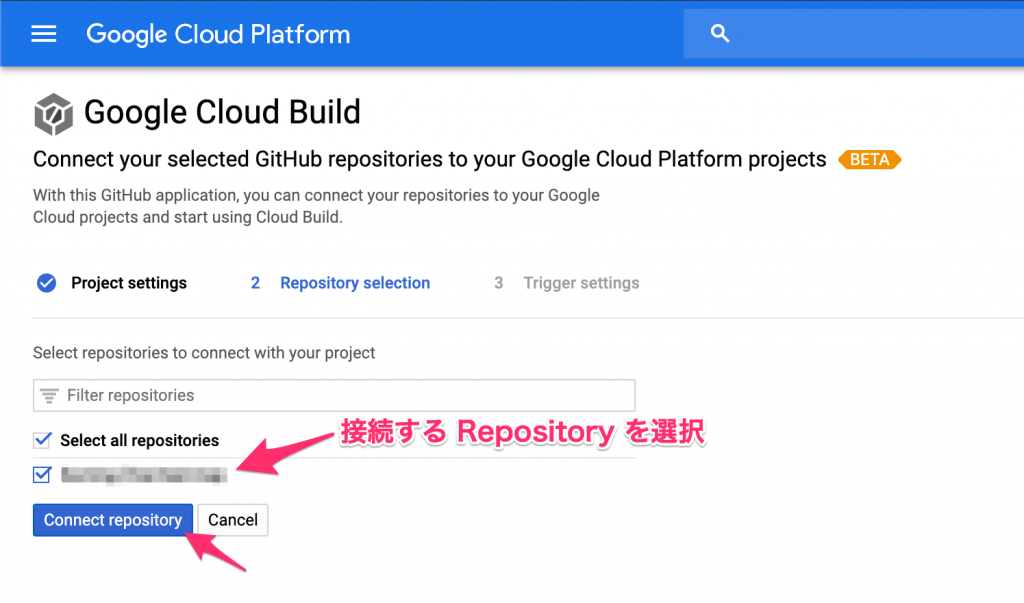
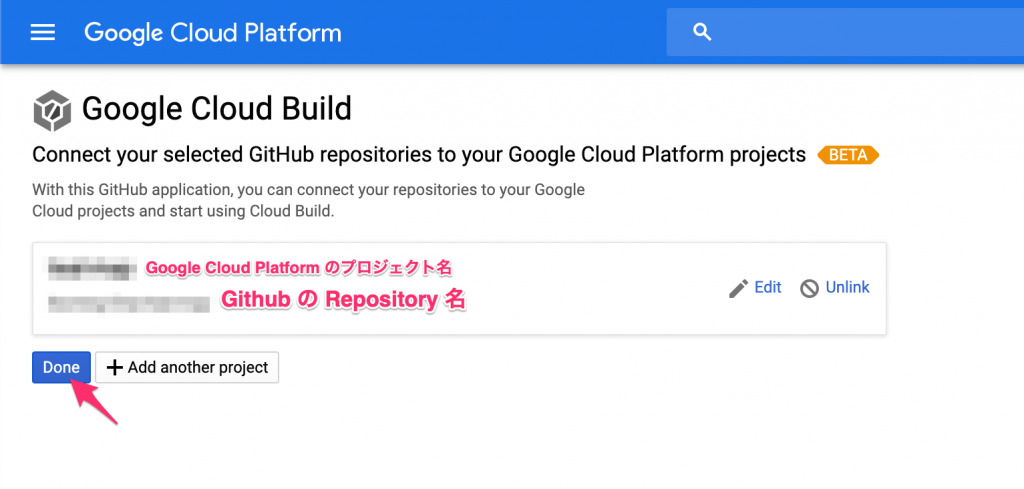
その後、Google Cloud とどの Github Repository を接続するかを選択します。その後、どのブランチをトリガーするかを聞かれますが、デフォルトではすべてのブランチになっています。このあと編集するのでここはそのまま進みます。完了すると Github のページになります。
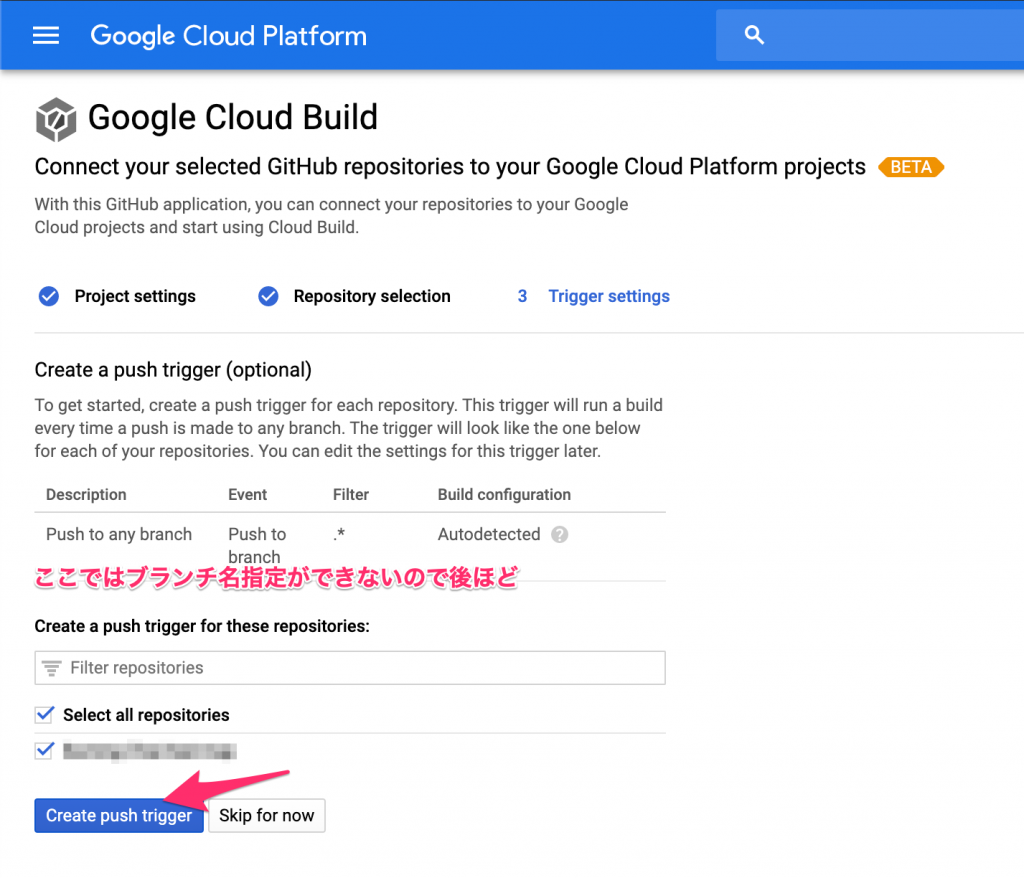
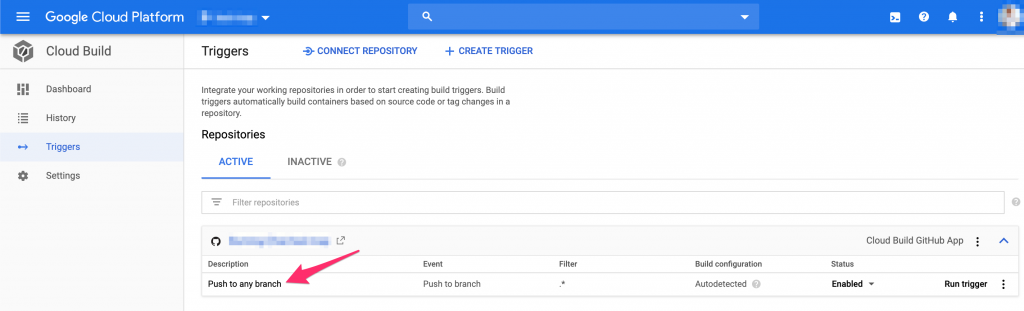
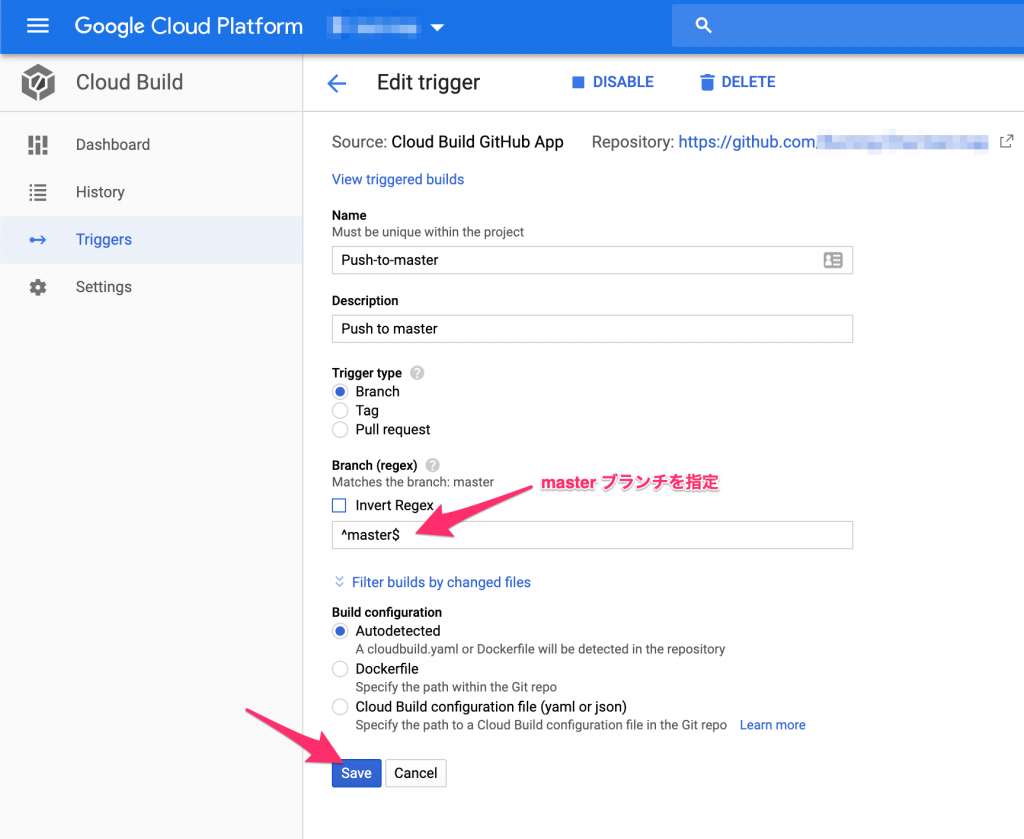
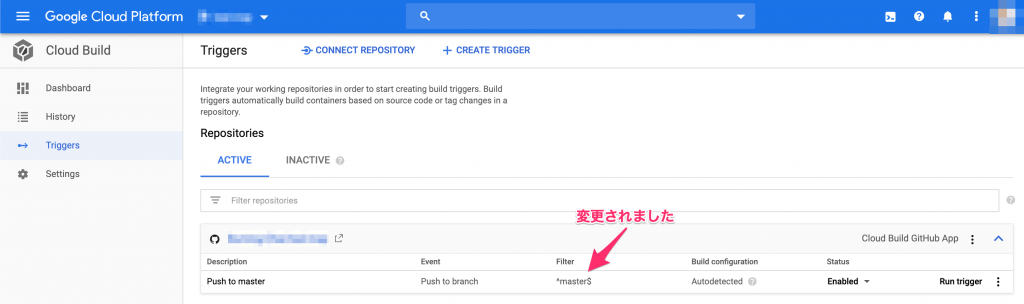
トリガーの起動イベントを修正します。いまはすべてのブランチがpushされたら起動するようになっているので、masterブランチのみにします。
Cloud Build の Triggers のページから設定しましょう。
cloudbuild.yml / firebase.json の準備
これでクラウド側の準備は完了です。残るはプロジェクト内に cloudbuild.yml と firebase.json を作成する必要があります。
cloudbuild.yml は CloudBuild でどのようなことをするかを記述したファイルです。これをプロジェクトルートに作成してください。
steps:
  - id: 'Install npm packages'
    name: 'node:12.9-buster'
    args: ['npm', 'install']
  - id: 'Build App'
    name: 'node:12.9-buster'
    args: ['npm', 'run', 'build']
  - id: "Deploy to Firebase"
    name: 'gcr.io/$PROJECT_ID/firebase'
    args: ['deploy']
上記の name プロパティでしているのがコンテナです。オフィシャルのもあれば、自分で作成したものをしていることができます。
firebase.json は firebase cli でデプロイするのに必要なファイルです。詳しくはこちらを参照してください。
作成は簡単です。プロジェクトルートで firebase init のコマンドを実行するのみです。
Firebase のどの機能についてセットアップしたいかを聞かれるので、Hosting をスペースで選択して Enter。
$ firebase init

     ######## #### ########  ######## ########     ###     ######  ########
     ##        ##  ##     ## ##       ##     ##  ##   ##  ##       ##
     ######    ##  ########  ######   ########  #########  ######  ######
     ##        ##  ##    ##  ##       ##     ## ##     ##       ## ##
     ##       #### ##     ## ######## ########  ##     ##  ######  ########

You're about to initialize a Firebase project in this directory:

  /Users/yanou/IdeaProjects/team-map/team-map-front

? Which Firebase CLI features do you want to set up for this folder? Press Space to select features, then Enter to confirm your choices.
 ◯ Database: Deploy Firebase Realtime Database Rules
 ◯ Firestore: Deploy rules and create indexes for Firestore
 ◯ Functions: Configure and deploy Cloud Functions
❯◉ Hosting: Configure and deploy Firebase Hosting sites
 ◯ Storage: Deploy Cloud Storage security rules
 ◯ Emulators: Set up local emulators for Firebase features
次にどの Google Cloud Platform のプロジェクトを利用するか聞かれますので、既存なり新規を選択してください。
? Which Firebase CLI features do you want to set up for this folder? Press Space to select features, then Enter to confirm your choices. Hosting: Configure and deploy Firebase Hosting sites

=== Project Setup

First, let's associate this project directory with a Firebase project.
You can create multiple project aliases by running firebase use --add,
but for now we'll just set up a default project.

? Please select an option:
❯ Use an existing project
  Create a new project
  Add Firebase to an existing Google Cloud Platform project
  Don't set up a default project
プロジェクト選択後は、どのディレクトリを Hosting へデプロイするかを聞いてきます。前回の記事の続きなので、今回 React を利用しています。ビルド後は build ディレクトリにファイルが生成されるので build と入力します。
=== Hosting Setup

Your public directory is the folder (relative to your project directory) that
will contain Hosting assets to be uploaded with firebase deploy. If you
have a build process for your assets, use your build's output directory.

? What do you want to use as your public directory? build
その後、SSA(Single Page Application) ですか?と聞かれるので Yes
? Configure as a single-page app (rewrite all urls to /index.html)? Yes
✔  Wrote build/index.html

i  Writing configuration info to firebase.json...
i  Writing project information to .firebaserc...

✔  Firebase initialization complete!
これで firebase.json が出来上がります。
その後、master に push を行って下さい。自動的にビルドが走り、Firebase Hosting へのデプロイも行われます。
一度設定してしまえば今後ラクができますので、是非試してみて下さい。Cloud Build は 120分/日 が無料として提供されています (2020/02/25時点)。個人なら無料枠内でできる十分に活用できると思います。
質問があれば、質問箱からよろしくお願いします。